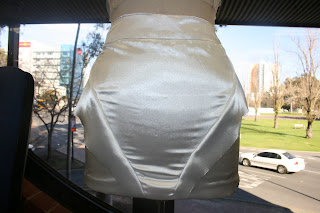
Wednesday, November 3, 2010

Finishing line!

I have officially crossed the finish line!!! After last weeks fittings with the models i had a lot of alterations to my bodices. All my skirts fit perfectly which i was very happy about but i knew all the bodices would need fixing up just by looking at them on a mannequin. I had help from my lecturers with fixing up each of my bodices which i am so grateful for!

Eventually every one of the bodices was altered. Some of the binding was changed along the top of a couple of bodices because the fabric had been shot to bits with all the work that we had done on it in the process of fixing it up! I really like how each bodice looks now as it ties in more with the other garments and it is a lot more sturdy along the bust which i was definitely happy about because i was fretting that the models boobs might fall out as they were walking down the runway.

I picked up my labels which look fantastic and they are exactly what i wanted. My range is portrays femininity and i thought it would be cliché to have my label in script text so I decided to go with an arial text. Although my is feminine it still gives some edge and i think choosing a bold text brings out that edge.

Monday, October 18, 2010

What makes me tick!?

Many things have made my little yet creative brain of mine tick over and over about fashion. Ever since i was a little girl i have always wanted to become a fashion designer. It has been a dream of mine and a vision to see my label up there amongst the other fabulous designers of the world. I remember writing 'Fashion Designer' on a piece of A4 paper with colourful pencils of little images and names of fashion capitals across the world back when i was 17. That piece of paper has been stuck on my bedroom ceiling for 5 years now and every time i go to sleep i look at it and hope one day my dream will come true.

My collection is all about the shape of a woman's body. I find that the curvaceous look is very feminine which i have sewn through each outfit. Each bodice is a soft pastel colour which is in crusted with Swarovski crystal beads. The structural skirts compliment the delicate bodices against there architectural shapes and soft de lusted tones. The two jackets i designed were to make an impact with manipulation of fabrics. One jacket has gathered ruffles protruding out of the top of the armholes and the other has a smocked back which is my favourite out of the two jackets. Some of my other favourites are the smocked skirt and the angled skirt.


Different things inspire me like the way a certain fabric will drape or a particular colour. Trends can make a huge impact on creating designs because if you want your designs to be trendy and "in" for that season. Some of my favourite designs like the silhouettes of Dior, the fit of Chanel or outrageous costumes of Galliano can create a wave of inspiration flow through me.

My inspiration came from a designer named Antonio Berardi, God's gift to woman. His work emphasised the curves of a women's body. He had a strong connection with his mother and always had an eye for passion. I found similarities with the designer and was instantly in amazement of his stunning work.

I would love to see my designs walking down the red carpet at any high end premiers, whether it be for movies awards, sporting awards, fashion shows and fashion awards, seeing my clothes in movies or just someone wearing out for a memorable night. It would be an honour to have well-known women who are absolutely fabulous in every way!

Two weeks!

Two weeks to go and i think i am making some progress! I have completed a number of outfits and have bagged them up so they don't get dirty. These outfit are as followed
  1. Skirt 1 (sew hanging tape and label)
  2. Skirt 2 (sew hanging tape and label)
  3. Skirt 3 (sew hanging tape and label)
  4. Smocked skirt (sew hanging tape and label)
  5. Overlay skirt (sew in hook and eyes, sew hanging tape and label)
  6. Frilled Armhole Jacket (sew hanging tape and label)
  7. Smocked Jacket (sew hanging tape and label)
  8. Bodice 1 (sew hanging tape and label, tighten back, fix centre binding)
  9. Bodice 2 (sew hanging tape and label, tighten back)
  10. Bodice 3 (sew hanging tape and label, tighten back)
  11. Bodice 4 (sew hanging tape and label, tighten back)
I have decided that when i have finished all garments i will fix the minor problems, insert the labels and hanging tape.

I now moved on to tackle the wedding dress! My lecturer helped me put the base pattern onto cad and we also worked out the three layers and the fullness of each skirt in cad. I had a gathering ratio of 4 to 1 which meant a lot of gathering! We also put on another pattern which was for my other skirt that i was waiting on starting as my fabric hasn't arrived!

I then put the patterns onto the plotting machine which marks out your patterns for you. A much more easier way when you have huge patterns! I then had to cut out my tulle for the wedding dress which is very tedious and annoying! After two days i had finally finished cutting out all of the tulle for the wedding dress and was ready to start sewing.

Sewing the wedding dress is a massive job! I sewed the first layer on to the base which made me realise how much time this is going to take me as it took me half a day to complete! I woke up fresh this morning and arrived at Tafe at 9:30am to continued with my wedding dress. As i continued sewing each layer on the dress it was getting heavier and harder to sew. I left Tafe tonight at 7:30 leaving my wedding dress with only one layer to be sewn on. However, the bottom layer was collapsing under the middle layer so it wasn't creating the fullness i wanted. I decided i would leave my questions until tomorrow to be answered, hopefully it would be an easy solution.

I still haven't heard anything about my fabric which i need for the other skirt which is a bit concerning. Hopefully it will be arriving on Wednesday which will give me all of Tuesday to complete my wedding dress!

Photos!

I decided to take some snap shots of my finished garments! Some show the details of the beading and the smocking, and other show the shapes of my structured skirts...

Frilled Armhole Jacket
Bodice 1 with Skirt 1
Side profile
Smocked Jacket
Bodice 3 with Skirt 3 (my favourite)
Side profile
Wedding Dress Bodice
Side profile
Bodice 4
Smocked skirt
Side profile
Overlay Skirt over Smocked Skirt

Wednesday, October 6, 2010

A Month!

Today is a month exactly until the parade and this information makes me slightly nervous! When i say what i need to do out a loud it doesn't sound like a lot but i know it is the beading that is going to kill me!

The rest of my beads that i had ordered have arrived which is fantastic as i was getting a little bit worried about them! I really need to start putting my wedding dress on CAD so that i can cut the patterns out and starts sewing that up. I have completed a smocking piece that needs to be inserted into the winged skirt and the tulle/georgette skirt i haven;t even thought about as i still don't know how i want it to fall yet! All these decisions which now i wish i had planned a little earlier because thinking is a time consumer as well these days along with ripping out my hair and crying! All i need to do is stay positive and then i know i will get it all done in time. I am very much looking forward to relaxing when the parade is done and over, and when all my work has been handed up.

Wednesday, September 29, 2010

Progress

I continued on with the binding for my smocked jacket. I had one of the lecturers helping me as it was very tricky trying to get the biding onto the 1cm seam allowance. After the binding was sewn onto the armhole i pressed all the seams. One jacket down and one more to go!

I then started on my other frilled jacket which i thought was going to take me longer as it had a collar and a completely different lining method to the smocked jacket. I was hesitant to begin this jacket but once i got started it was a hard as i thought! I had already sewn the jacket and the jacket lining together, so the next step was to attach the collar and the sleeves. When i sewed the sleeves to the jacket i realised that i forgot to insert the frills into each armhole! I started unpicking and then gathered up the tulle and silk organza which was then pinned and sewn onto the top of the armhole. Once the sleeves were sewn in i had to sew and bluff the hem, then pull the jacket out and sew the sleeve hems together, and presto, Another jacket finished!

I cut out pink, cream and oyster coloured binding and pressed four pink strips so they were ready to be sewn onto my pink bodices. Manually binding is a pain in the bum but the binding went on so much better than sewing it through the binding machine! I ended up binding the top and bottom of two pink bodices with patience, a lot of patience!

I had to buy another role of silk Georgette because i didn't have enough of the original colour that i had already cut out to make the overlay skirt. Once i had cut out the new colour of the silk Georgette i sewed french seams and gathered the waist ready for the waist band to be sewn on. I pinned the overlay skirt onto the mannequin so that the fabric could sit overnight so i could get the hem even.

I had to sew the hook and eye tape which i finally arrived onto my bodice but i didn't know what method i had to use. Luckily Tafe is open during our "holidays" and one of our lovely lecturers was coming in so i decided to leave it until then. Once i knew the method i sewed the hook and eye tape in straight away and couldn't believe how easy it was!

I am very excited looking at the garments that i have completed which makes me feel like i am working at a good speed. I have completed three skirts, two jackets and one bodice which is in crusted with Swarovski crystal beads!

Saturday, September 18, 2010

Break Down!!!

It was by far the most worst day yet i was to encounter. It was a shocker!!! I had run out of beads over the week end and couldn't find any over the week end as all the places were closed who stocked them. Come Monday morning i was running around all morning buying more beads. I then had to find this wholesale flower shop which was very difficult to find nether the less i found it! I had my first photo shoot so i was desperately wanting to get everything finished on time and deep down i knew that i was pushed for time. I had completed majority of my beading so i began on my binding which i thought was going to be easy. Turned out that every binding machine that i tried didn't want to cooperate with me today as it kept messing up over and over again! I was so ultimately frustrated i left in tears to my photo shoot with my binding half completed. On the way there i realised that i had forgotten to take my skirt with me so i we could only photograph my bodice which wasn't so bad as we got some beautiful profile shots. I felt terrible rocking up at the photo shoot so unprepared so i was hoping my next photo shoot i was prepared for anything!

After having a good nights sleep i was hoping today was going to be a better day than the last! I finished the hem on my second skirt and continued on with my third skirt. I cut, fused and sewed the waistband, and even sewed the zip in perfectly! I then tried the skirt on and noticed that the bottom half of the skirt wasn't as stiff as the top layer so i decided to sew some boning into the side seam which made it stand out perfectly the way i wanted it to.

I decided to give the binding machine another go as my lecturer offered to help however, we had no luck it was still not cooperating at all! I now have to complete all my binding manually, absolute nightmare!

I then finished off the hem of the third skirt and continued on with the smocking jacket. I had to wedge the centre back side and neck seams into the centre front side and neck seams then pull them out and press. I then attached the sleeves to the jacket and decided to try it on, and was very impressed with my work! I still had to bind the armhole of the jacket but decided to leave it until i could advise my lecturers.

Friday, September 10, 2010

Sewing

I received the rest of my fabric that i had been waiting for which was a relief as i was starting to worry! I bought some navy silk dye and was excited to experiment when i got home. I sewed the last two bodices in the fabric that i had received over the week end. I then cut out the casings for the two bodices and pressed them in half so they were ready to be sewn to the bodices. I pattern made some bias strips for the binding about 3.8cm wide. I cut out the rosa pink satin fabric for the binding first as i wanted to insert the cups and get started on the beading. After binding the centre fronts of the three rosa pink bodices i sewed the cups in.

I came across a dilemma...again! After sewing the cups in i noticed they sat funny on the mannequin. The cups fall forward and I'm worried that the models breasts might fall out as they are walking down the catwalk. I had to make some decisions so i decided that i would bind all the way across the front which would form a shape across the centre front. I thought this would be the best outcome as each bodice would have a different shape across the centre front.

I then started sewing the casings onto the champagne eggnog bodices so they were ready to have the cups sewn into the two bodices.

I had completed some silk dyes with the navy blue dye and i wasn't sure about the colour or even how it was going to look on the skirt itself. I needed to decided quickly so i matched the piece of silk i had dyed, pinned it to the skirt and fit it to the mannequin, then pinned the bodices over top to how it would look if someone were to wear it. It looked black behind the bodice and a couple of my friends said that it would look better all in the one fabric. I was happy about the decision that i made and acted quickly to finish the skirt. I cut out the waist bands and started sewing them together. Everything was going smoothly, i had sewn in my zip and was about to attach my lining to the skirt when i went to ask my lecturer on a method i was about to perform. My lecturer looked at the skirt and then told me that i had forgotten to fuse my waistband! I had to unpick the whole waistband, and part of the zip, and cut out another whole waistband and not forget to fuse it! I went on to sew the waistband again, sew one side to the skirt and the other to the lining. I sewed my zip back together and then bagged out the corners of the waistband and both the zip and the top of the waistband lined up perfectly! I had planned arrange my photo shoot on Monday so I'm beading the bodice which i want to be shot in the photo over the week end.

Sewing

I continued sewing the casings onto the bodices and pressed all of the casings after. I had to make sure that all the casings measured .7cm so that the metal boning would slide in perfectly. I then started sewing my smocking jacket together by sewing up the centre back and then pressed the seam open. I then sewed french seams on the sleeves of my jacket and pressed them to one side. I worked out that there were an even amount of squares on the smocking piece that i had done so i pinned the centre back through the middle square. The centre back block just fit onto the smocking piece! I then pinned all around the side seams, hem, shoulder and neck very carefully and made sure it didn't pull unevenly. I stay stitched around the areas i had pinned and then overlocked the edges off. I had to bind the hem and neck of the jacket so i cut out a piece of the Faille of about 3.8cm. I then started sewing the front of the jacket by sewing the hem and buffing it then the centre front and the shoulder. After i had sewn all pieces perfectly together i realised that i didn't put a dart in the facing of the jackets so it didn't fit which meant i had to cut out another set of facings and unpick the other facing off the jacket and re sew the new facing in! How annoying! I decided to leave the jacket for now because i was a bit frustrated. I also realised that the cups of my bodices weren't stiff enough so i unpicked each set of the cups and fused Pelham to each of them. Then i realised that i had fused some of the Pelham to the same cups which meant i didn't have a right and a left! I was not having a good day! I then unpicked all the other cups and fused the Pelham onto the cups. Went on sewing the cups together and topstitching across the seams. I completed two pink cup sets which i was pretty happy with.

I continued sewing the cups of the bodices and i managed to steam my finger whilst pressing the cups seams open which hurt! After i had completed sewing all the cups together i moved on with my jacket. I sewed and bluffed the hem then sewed the centre front and the shoulder together. I left my jacket and decided to go and find some glue to dip the ends of my metal boning to prevent the ends from rusting and ripping the fabric when its all sewn in. I also had to find some navy blue food dye the dye my waistbands so i went and bought some food dye to experiment with. The blues turned out alright but i realised that if i were to wash the skirt the blue would run which i didn't want so i would have to go on the hunt for some silk dye. I thought if i got some time this week end i would attempt to do some beading over the week end.

Sunday, August 29, 2010

More sewing!

I had to unpick my jacket as i had sewn the facing in the wrong way because i had cut too many pieces! I then sewed the correct facings to the jacket and pressed all the seams open and pressed the darts.

I then started sewing all my pink bodices together which was tricky as i had to sew three layers of each pieces then sew the pieces together, rather fiddly! I had to cut out fusing for the cups of the first bodice and then sewed them together. I continued cutting out fusing for all the cups of the bodices and then went on to fuse and sew together so they were ready to be sewn to the bodices. I couldn't attach the cups to the bodices as i had to insert the boning first. I then sewed the oyster bodice bodice and then pressed all the seams of each bodice towards the back.

I continued with my smocking but then i realised that i was waisting time doing it at Tafe when i could be doing it at home whilst watching the Tele.

I continued on with my third skirt and finally finished it! The zip matched up perfectly and i was so proud of myself! I then went on to experiment what method i would use for the casings that the boning would be inserted into. I talked to my lecturers and they advised me to cut a 3.5cm strip of fabric on the grain line because if it were cut on the bias it would be more difficult to sew onto the bodice. I didn't really need to try any other methods as the first toile worked out really well, so i decided to go with that method. I was very excited that i was sewing in my casings and then went to find Lesley to see if my boning had arrived which luckily enough it did but she had to cut it and get it ready for me. I decided to continue with preparing my casings but i had to see if my fabric was going to work as well as it did in the first toile. I cut a strip out of my fabric and sewed it to my bodice. I then pressed it and it looked fantastic which was a relief as i was scared i would have to unpick and try another method! I began to cut out strips of my fabric for the casings so they were ready to be sewn to the bodices.

Friday, August 20, 2010

Sewing and Smocking

I set up my machine ready to sew the outer shells and linings of my jackets. I decided i would wait until Monday to sew the jackets completely together because i know i would need some help from the lecturers as i have forgotten bit and pieces of how to sew a jackets properly!

I then had to make up a grid for my smocking. I cut a 1.5m of Calico and began ruling up a grid 3cm by 3cm so it would be easier to dot onto the Georgette. I thought it was going to take me forever to dot the fabric because the grid was huge but it only took me about half an hour. I then started to smock the Georgette. I did ask my lecturer if i had to use a stronger thread to smock with but because i have a backing behind it i wouldn't need to, and the thread i had was pretty string anyway. I only completed 2 lines until it came to my attention that it was time to go home so i would just continue to smocking the humongous piece of Georgette at home over the weekend. I was a bit worried about the colour of the fabric against the Faille because they didn't really blend. I asked a couple of my friends what they thought and they advised me it looked great and i shouldn't worry!

Fusing and Sewing

I decided i would leave my wedding dress until i had completed all the other garments because there is a lot of work to do for the skirt part of the dress. I also wanted to begin sewing my bodices together because i have so much beading to do!

I cut out the fusing for my fourth skirt and fusing them so they were ready to sew. I held off sewing the forth skirt because it was a bit tricky with the assembly sequence. I decided to cut out the fusing for the jackets and fuse them so they were ready to sew after i had sewn all the skirts together.

I continued sewing the third skirt and realised that i had bluffed the wrong side of one of the skirt panels! I had to unpick and then bluff the other side of the skirt which didn't take that long to do but it was frustrating! I started to pin the hems of the skirt panels together and then sewed them .5cm. The skirt looked fantastic and i was so excited i tried it on and it looked even better when on the body!

I then started the fourth skirt together which was very tricky and then realised that i had forgotten to leave the seams apart because i had to insert the smocking pieces! I decided i would leave the skirt the way it was and when it came inserting the smocking then i would figure out how to sew it together.

Fusing

After cutting out majority of my fabric i began cutting out the fusing for the Faille as the fabric creases and bruises easily. This took me a couple of days to cut out the fusing. I ended up running out of fusing and i had almost finished cutting out all the fusing for the skirts! I decided i would fuse the skirts and cut out the fusing for the rest of the garments that were in the Faille when i could get some more. It took me the rest of the day to fuse the skirts and i had to wait a bit because there was a line to fuse!

My skirts was ready to sew and i was very nervous to start because i didn't want to stuff up anything! The skirt turned out really well and i was so impressed as the fabric looked beautiful and the shape of the skirt fit nicely on a human body. I then pressed all the seams open on the skirt. After sewing it i realised that i had cut the Faille fabric for the lining and i needed normal lining because the faille fabric was so thick already. I cut out the lining for the skirt again in the normal lining and cut out some fusing then went down to fuse it so it was ready to be sewn which didn't take that long.

I began sewing the second skirt and then realised i had forgotten to cut out a couple of lining pieces! I was really annoying because i was sick of cutting out more fabric and fusing. I left the second skirt and cut out more lining and fusing, then fused the pieces and sewed them together then sewed them to the skirt. I had gotten some more fusing so i could cut out the rest of the fusing for the third skirt. I then fused the skirt pieces and began sewing the third skirt together but only sewed the outer shell.

Monday, August 9, 2010

More fabric=more cutting!

I had ordered more fabric throughout the week and it was ready for me to pick up which i was so excited about! Come Monday morning ill have even more pattern pieces to cut out! Unfortunately my champagne eggnog stretch tulle isn't available to send out until the end of August! I was a bit worried at first but then i realised i have so much to cut out and sew in the mean time that i won't feel as though I'm not doing anything while waiting for the fabric to arrive.

I arrived at Tafe with my big bundle of fabric ready to cut out. I began cutting out the cups for the Rosa pink and oyster bodices. As the bodice cups were so small it didn't take me that long to cut the cups all out.

Cutting!

I continued cutting out all the pattern that were in the cream Faille. This took me majority of the day and my hands were extremely sore today and i kept getting cramps so i had to stop every now and them and do some hands exercises to keep my blood flowing. When i left Tafe i noticed that my thumb began to swell up and i was freaking out thinking that it was going to pop off! It slowly went down but i think i might have pinched a nerve from all the cutting i had completed in the last two days.

I arrived at Tafe early to continue with my patterns because i wanted to get ahead of myself as i felt a bit behind, even though i was the only one that had started cutting, and i thought to myself i have so much beading to do that i need to be a little bit ahead! Today i started cutting the oyster Faille and i had a lot of skirt pieces to cut out which took me a whole 2 days to cut for 2 skirts as they had so many pieces! I then realised i hadn't cut out my linings but it wasn't a lot of cutting because the majority of the designs had to be self lined in the fabric as you would see the contrast of the 2 if i had done the lining. I still have to cut out the cream lining for the skirts and jackets, and i need to cut fusing for all pattern pieces in the Faille material!

Cutting!

Another week a new mission and I'm a little bit scared! I received some of my fabric and began cutting! I decided to cut out all of my pink bodices and had to fold the fabric three times so i had three layers of each pattern piece. I decided all my bodices would have three layers as it was an appropriate sheerness. My hands were so sore after cutting out the three bodice patterns i decided to have a rest! I then began cutting my cream Faille for my skirts but i only was able to cut out one pattern of the skirts in that fabric and i felt that i had gotten a lot accomplished.

Thats me, scared!

Jackets!

I moved on from the first jacket to start pattern making my second jacket which was a little more complex as it had a collar and a lapel. From what i remember in second year tailoring, these were hard! Yipee (sarcasm)

I wasn't really sure where to begin so i called over my lecturer for some guidance. It was similar to the first jacket but i had to add a collar. I also had to split the dart in the back pattern into two which involved measuring the dart and dividing it in half and there was the value of each dart. I made one dart longer than the other as it appeared on my fitted jacket that i had imitated for the lapel on my first jacket.

With everything traced off i began to cut our my patterns reading to toile up my second jacket. I sewed the body of the jacket together with one sleeve attached then fit it to a mannequin. I noticed the shoulder points were pulling back and the collar was up too far so i decided to trim it about 3cm which made it a little bit better. I didn't like the shape of the lapel either and when it came to pinning the collar into place i realised i didn't like how small the collar was when it was rolled over. I talked with my lecturers about this problem that i had come across and the only option was to redraw and toile up the jacket for the second time. I went back to my front master and redrew the lapel and made the collar bigger. After making the adjustments i retraced and cut out my toile again. I found the second toile to be a much better look and fit around neck.

I then started to play around with the frills on the shoulders. Although the detachable sleeve was a brilliant idea it would be a very difficult thing to fiddle with when making and it would create a bulkier look in the armhole seams. I decided to ditch that idea and just insert frills but i wasn't sure what fabric to use to get the fullness of the frill. I made one frill consisting of tulle and attached it to one shoulder and the other frill out of netting and attached it to the other shoulder. I then talked with my friends about which one they preferred and my wonderful friends Petricia suggested that i use both tulle, netting and bits of organza together for each frill! It was a fabulous idea which i tried out and it turned out so well! Now i just have to play around with the fullness and the length of the frills.


Jackets!

It was time to start my jackets which i was dreading because i have always thought jackets to be hard! The first jacket had smocking on the back so i pattern made a backing for it to go onto and took out the dart into the centre back. I then pattern made the front of the jacket which i made similar to one of my jackets because i really liked the shape of the lapel which was a roll collar and this was easy to pattern make. When it came to pattern making the sleeve i decided to make the width at the bottom bigger because i wanted someone to be able to roll the sleeve about three quarters of the way up. I traced all the pattern pieces off and started cutting each pattern out. I had sewn french seams down the centre back and on the sleeves. I fit the jacket onto my mannequin and thought the collar looked amazing. I then tried the jacket on to examine the length of the sleeve and to test how the sleeve would roll up my arm. I folded the sleeve twice and rolled it up my arm where it sat comfortably and examined myself in the mirror, and liked what i saw!


Skirts, Skirts, Skirts!

I began today laying my patterns out to cut and toile the next skirt which looked a little complicated as the wings and the smocking pieces were sewn at the same time so i had to make sure that i pinned the seams securely. When i had sewn the skirt together i wasn't as impressed with the outcome like i was with the other skirts. I think i was a bit disappointed with how the wings sat on the skirt as they didn't sit up as i thought they would have. I then i realised that when they have fusing and shape well in the wings that they would sit up better because they would be more structured on the inside. What made it even better was that my lovely friends Petricia and Vanessa said that it looked wonderful so i took there word for it and hoped they weren't lying haha :P


I then had to make the skirt that draped over the top which attached around the waist. I wanted the skirt to flow behind when someone walked in it which meant i would have to make a full circle skirt pattern however, the length of my skirt would not fit on the width of the fabric so i would have to cut 2 half circle skirts which would be sewn at the side seams to get the fullness of a full circle skirt. This was a very easy pattern to make and toile, the only difficult thing was cutting the pattern out on Georgette as its so slippery! My lecturer then advised me to sew french seams because they are more appropriate finish of garments that are sheer.


I designed this skirt to also be worn as a cape or a shawl. I wanted something that could be worn different ways and because I'm using a sheer fabric i thought this would look absolutely beautiful if worn both ways.

Saturday, July 31, 2010

skirts, Skirts, Skirts!

I arrived at Tafe early to begin sewing my third skirt. This is my favourite skirt because i love the design. This skirt was quiet easy to sew and i was surprised as it had a lot more pieces involved however it did take longer! When i had sewn all the pieces together i then went to fit the skirt to the mannequin when i realised i hadn't put a centre back seam in! I didn't panic though as it was pretty simple to fix, i just cut down the centre back and re traced my centre back pattern so i had two pieces for the back. I was immediately impressed when i saw it on the mannequin! I couldn't believe that all my toiles had turned out so well so far that i really didn't want to jinx myself!


I began pattern making the next skirt which had a lot of panels that incorporated the smocking that appeared underneath the wings of the skirt. I had to ask for some help with this one especially with the side seams because the smocking is in the Georgette which attaches to a firmer fabric and I'm very worried that it might pull and tear. I was pattern making this skirt for the rest of the day which i completed so it was ready to cut out my toiling tomorrow. Hopefully i haven't jinxed myself!