Friday, August 20, 2010

Fusing

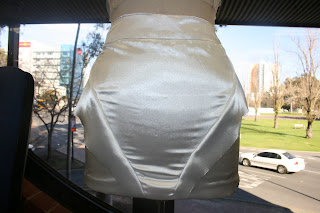
After cutting out majority of my fabric i began cutting out the fusing for the Faille as the fabric creases and bruises easily. This took me a couple of days to cut out the fusing. I ended up running out of fusing and i had almost finished cutting out all the fusing for the skirts! I decided i would fuse the skirts and cut out the fusing for the rest of the garments that were in the Faille when i could get some more. It took me the rest of the day to fuse the skirts and i had to wait a bit because there was a line to fuse!

My skirts was ready to sew and i was very nervous to start because i didn't want to stuff up anything! The skirt turned out really well and i was so impressed as the fabric looked beautiful and the shape of the skirt fit nicely on a human body. I then pressed all the seams open on the skirt. After sewing it i realised that i had cut the Faille fabric for the lining and i needed normal lining because the faille fabric was so thick already. I cut out the lining for the skirt again in the normal lining and cut out some fusing then went down to fuse it so it was ready to be sewn which didn't take that long.

I began sewing the second skirt and then realised i had forgotten to cut out a couple of lining pieces! I was really annoying because i was sick of cutting out more fabric and fusing. I left the second skirt and cut out more lining and fusing, then fused the pieces and sewed them together then sewed them to the skirt. I had gotten some more fusing so i could cut out the rest of the fusing for the third skirt. I then fused the skirt pieces and began sewing the third skirt together but only sewed the outer shell.

Monday, August 9, 2010

More fabric=more cutting!

I had ordered more fabric throughout the week and it was ready for me to pick up which i was so excited about! Come Monday morning ill have even more pattern pieces to cut out! Unfortunately my champagne eggnog stretch tulle isn't available to send out until the end of August! I was a bit worried at first but then i realised i have so much to cut out and sew in the mean time that i won't feel as though I'm not doing anything while waiting for the fabric to arrive.

I arrived at Tafe with my big bundle of fabric ready to cut out. I began cutting out the cups for the Rosa pink and oyster bodices. As the bodice cups were so small it didn't take me that long to cut the cups all out.

Cutting!

I continued cutting out all the pattern that were in the cream Faille. This took me majority of the day and my hands were extremely sore today and i kept getting cramps so i had to stop every now and them and do some hands exercises to keep my blood flowing. When i left Tafe i noticed that my thumb began to swell up and i was freaking out thinking that it was going to pop off! It slowly went down but i think i might have pinched a nerve from all the cutting i had completed in the last two days.

I arrived at Tafe early to continue with my patterns because i wanted to get ahead of myself as i felt a bit behind, even though i was the only one that had started cutting, and i thought to myself i have so much beading to do that i need to be a little bit ahead! Today i started cutting the oyster Faille and i had a lot of skirt pieces to cut out which took me a whole 2 days to cut for 2 skirts as they had so many pieces! I then realised i hadn't cut out my linings but it wasn't a lot of cutting because the majority of the designs had to be self lined in the fabric as you would see the contrast of the 2 if i had done the lining. I still have to cut out the cream lining for the skirts and jackets, and i need to cut fusing for all pattern pieces in the Faille material!

Cutting!

Another week a new mission and I'm a little bit scared! I received some of my fabric and began cutting! I decided to cut out all of my pink bodices and had to fold the fabric three times so i had three layers of each pattern piece. I decided all my bodices would have three layers as it was an appropriate sheerness. My hands were so sore after cutting out the three bodice patterns i decided to have a rest! I then began cutting my cream Faille for my skirts but i only was able to cut out one pattern of the skirts in that fabric and i felt that i had gotten a lot accomplished.

Thats me, scared!

Jackets!

I moved on from the first jacket to start pattern making my second jacket which was a little more complex as it had a collar and a lapel. From what i remember in second year tailoring, these were hard! Yipee (sarcasm)

I wasn't really sure where to begin so i called over my lecturer for some guidance. It was similar to the first jacket but i had to add a collar. I also had to split the dart in the back pattern into two which involved measuring the dart and dividing it in half and there was the value of each dart. I made one dart longer than the other as it appeared on my fitted jacket that i had imitated for the lapel on my first jacket.

With everything traced off i began to cut our my patterns reading to toile up my second jacket. I sewed the body of the jacket together with one sleeve attached then fit it to a mannequin. I noticed the shoulder points were pulling back and the collar was up too far so i decided to trim it about 3cm which made it a little bit better. I didn't like the shape of the lapel either and when it came to pinning the collar into place i realised i didn't like how small the collar was when it was rolled over. I talked with my lecturers about this problem that i had come across and the only option was to redraw and toile up the jacket for the second time. I went back to my front master and redrew the lapel and made the collar bigger. After making the adjustments i retraced and cut out my toile again. I found the second toile to be a much better look and fit around neck.

I then started to play around with the frills on the shoulders. Although the detachable sleeve was a brilliant idea it would be a very difficult thing to fiddle with when making and it would create a bulkier look in the armhole seams. I decided to ditch that idea and just insert frills but i wasn't sure what fabric to use to get the fullness of the frill. I made one frill consisting of tulle and attached it to one shoulder and the other frill out of netting and attached it to the other shoulder. I then talked with my friends about which one they preferred and my wonderful friends Petricia suggested that i use both tulle, netting and bits of organza together for each frill! It was a fabulous idea which i tried out and it turned out so well! Now i just have to play around with the fullness and the length of the frills.


Jackets!

It was time to start my jackets which i was dreading because i have always thought jackets to be hard! The first jacket had smocking on the back so i pattern made a backing for it to go onto and took out the dart into the centre back. I then pattern made the front of the jacket which i made similar to one of my jackets because i really liked the shape of the lapel which was a roll collar and this was easy to pattern make. When it came to pattern making the sleeve i decided to make the width at the bottom bigger because i wanted someone to be able to roll the sleeve about three quarters of the way up. I traced all the pattern pieces off and started cutting each pattern out. I had sewn french seams down the centre back and on the sleeves. I fit the jacket onto my mannequin and thought the collar looked amazing. I then tried the jacket on to examine the length of the sleeve and to test how the sleeve would roll up my arm. I folded the sleeve twice and rolled it up my arm where it sat comfortably and examined myself in the mirror, and liked what i saw!


Skirts, Skirts, Skirts!

I began today laying my patterns out to cut and toile the next skirt which looked a little complicated as the wings and the smocking pieces were sewn at the same time so i had to make sure that i pinned the seams securely. When i had sewn the skirt together i wasn't as impressed with the outcome like i was with the other skirts. I think i was a bit disappointed with how the wings sat on the skirt as they didn't sit up as i thought they would have. I then i realised that when they have fusing and shape well in the wings that they would sit up better because they would be more structured on the inside. What made it even better was that my lovely friends Petricia and Vanessa said that it looked wonderful so i took there word for it and hoped they weren't lying haha :P


I then had to make the skirt that draped over the top which attached around the waist. I wanted the skirt to flow behind when someone walked in it which meant i would have to make a full circle skirt pattern however, the length of my skirt would not fit on the width of the fabric so i would have to cut 2 half circle skirts which would be sewn at the side seams to get the fullness of a full circle skirt. This was a very easy pattern to make and toile, the only difficult thing was cutting the pattern out on Georgette as its so slippery! My lecturer then advised me to sew french seams because they are more appropriate finish of garments that are sheer.


I designed this skirt to also be worn as a cape or a shawl. I wanted something that could be worn different ways and because I'm using a sheer fabric i thought this would look absolutely beautiful if worn both ways.